Webmistress: Casey
Webhost: Dreamhost
Coding: Casey
Design: Casey
Number of Vids: 52
Views:
Masking
Okay, masking. One of the best, yet hardest things to do in Vegas. (Please note, only Sony Vegas has this. Vegas Movie Studio does not.)
What I'm going to do is take a person and put them in a new background. (In this case, I'm putting Hermione from the OotP trailer and putting her with a Hogwarts background.)
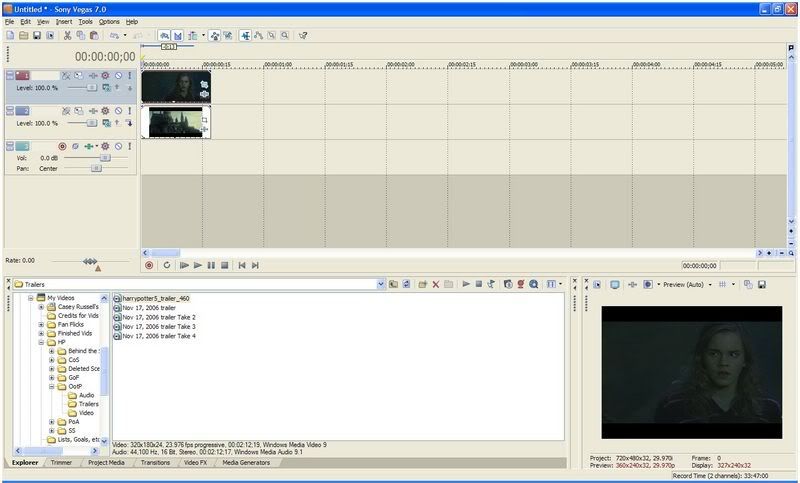
First make sure your clips are edited how you want (effects, speed, pan/cropped, etc.). Also, make sure they're the same length.
Now, open up the pan/crop window on the top clip. (Always make sure what you're masking is on top of the new background.)
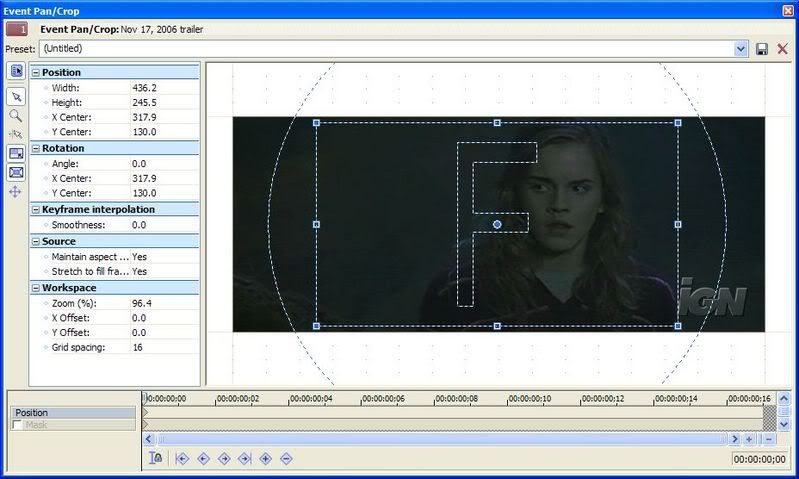
I already explained most of the functions of this window in the other tutorial, so if you don't know all of them, go to that tutorial first.
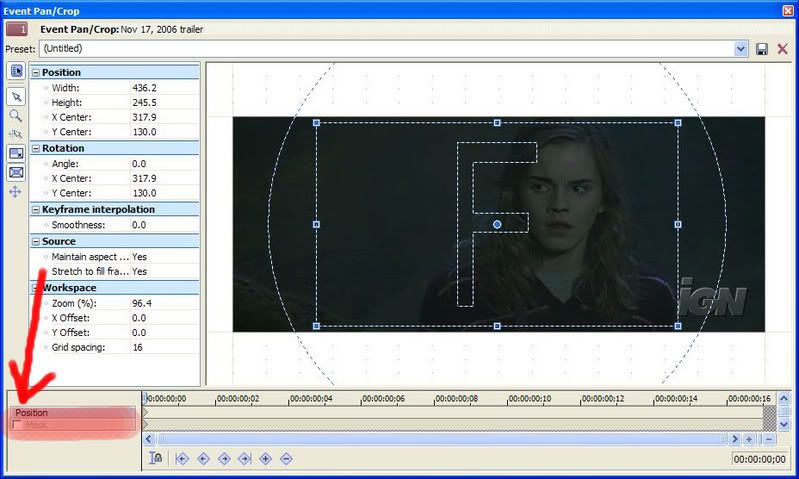
Go to the button saying "mask"—circled with an arrow pointing to it—and click the checkbox.
Immediately new buttons will appear in place of the older ones, and the dotted lines surrounding your clip will dissappear.
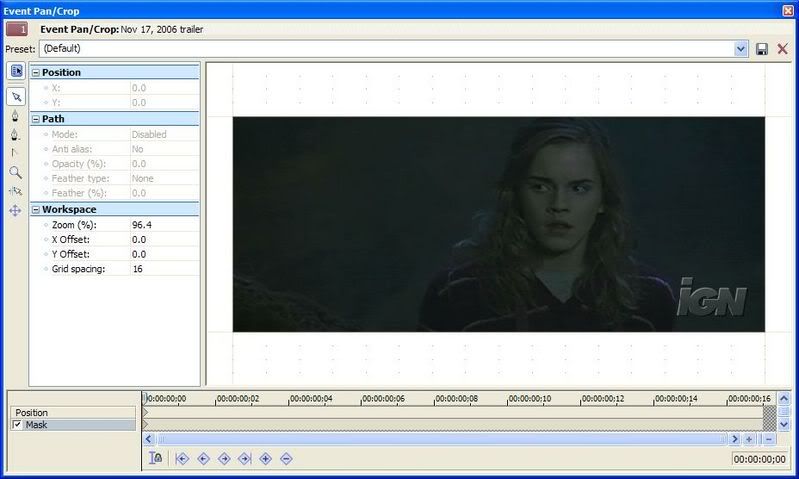
Here's an explanation of the highlighted buttons (the ones you need to know):
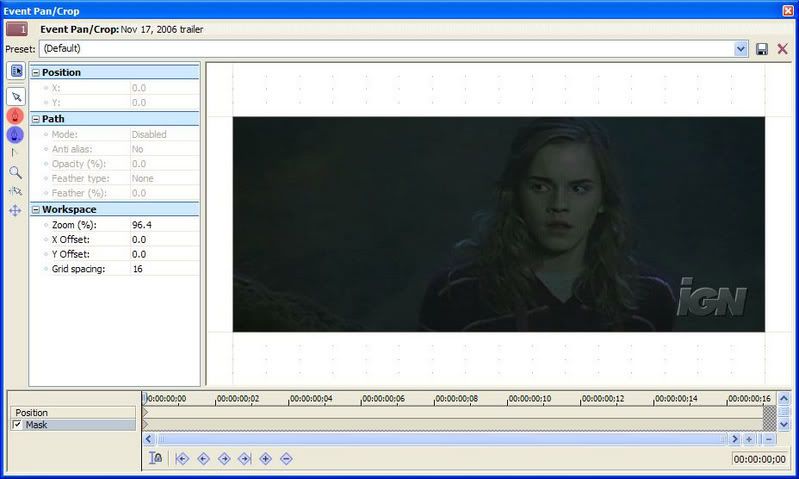
The one highlighted in red is called the Anchor Creation Tool. This is the button you need to mask with. It will let you make an outline of what you want to take and put in the new background. The one hightlighted in blue is called the Anchor Deletion Tool. If you make a mistake in your masking this allows you to delete it.
Okay, so far so good, right? Well, now it gets harder.
Click the Anchor Creation Tool and outline what you want to mask. After finishing, it should look like this:
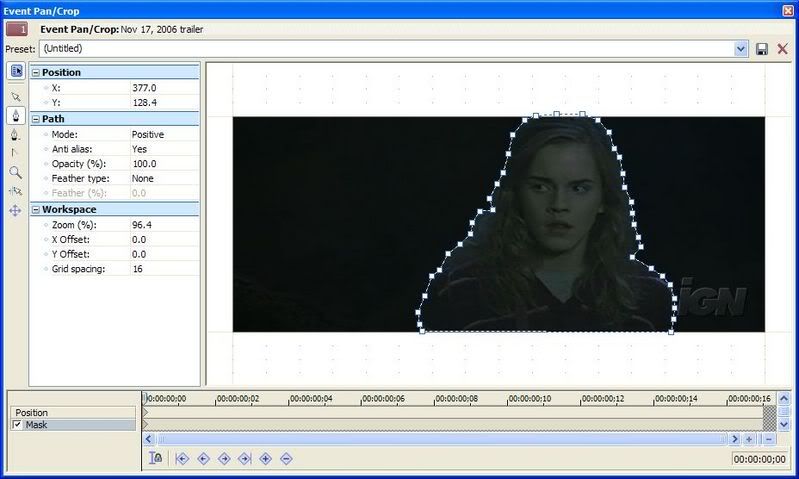
I know, doesn't blend very well, does it? Well, we're not done yet!
Now, you go over to this area called "path".
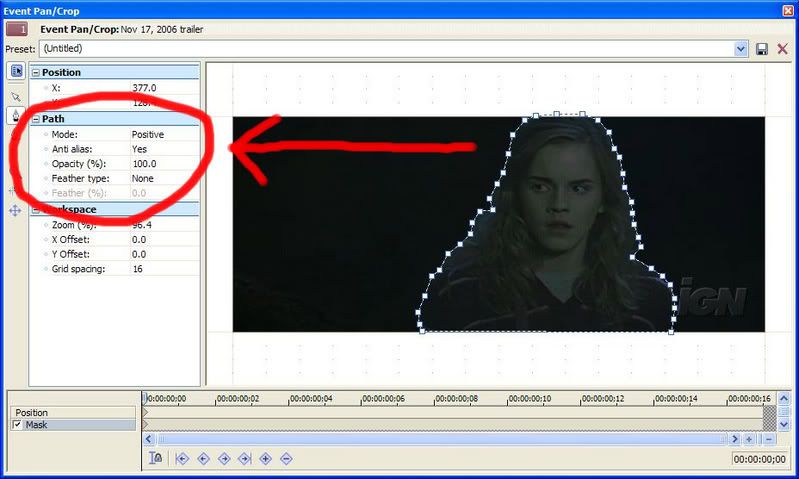
Go over to "feather type" and choose one of the options—in, out, or both. For this I chose "in" which will make it blend inwards. (Out blends outward, and both blends both in and out.) Then go to feather percent (which is now able to be clicked) and choose how much you want it blended—but watch out! If you chose "in" at feather type, it will take away from what you outlined!
It should look like this:
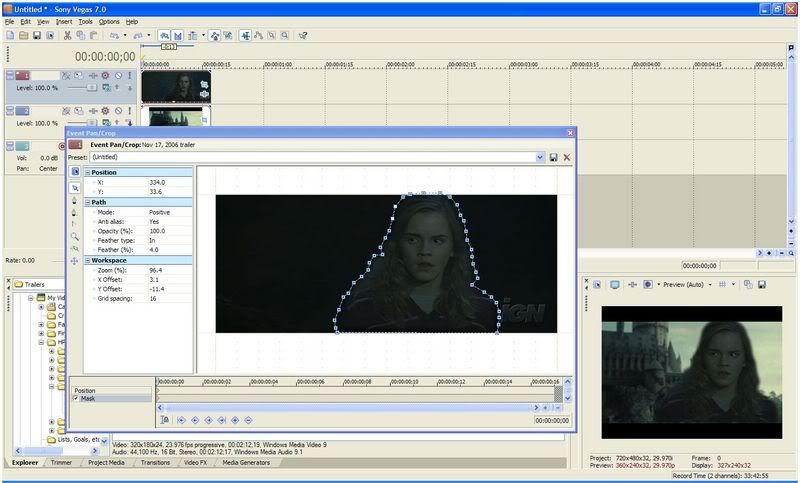
Are we done yet? Nope, sorry! One thing about this outline is that it doesn't move, while the thing you've masked WILL move. This is where keyframes come in. (Once again, circled with an arrow.)
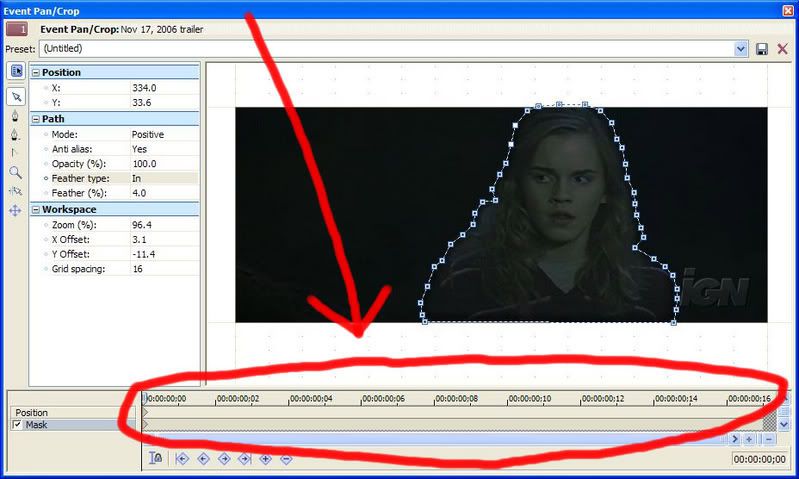
Keyframes are the frames that make up the length of you clip. Take the scrubber and run it across the length. If it moves, you have more masking to do. At each keyframe where you have to move your outline click the button "insert keyframe" and it'll save what you did.
If your mask moves, you may have to move your anchor points. Go to the keyframe where it moves into a different position, click away from your outline, then click a point on your mask to move it to where you need it.
HTML Comment Box is loading comments...

